概要
前回の続きです。
環境
- Ubuntu 14.04
- OpenAM 13.0.0
OAuthプロバイダの作成
http://openam.example.com:8080/openamにアクセス

前回のインストールで設定した
- ID: amAdmin
- PW: hogehoge
でログイン。

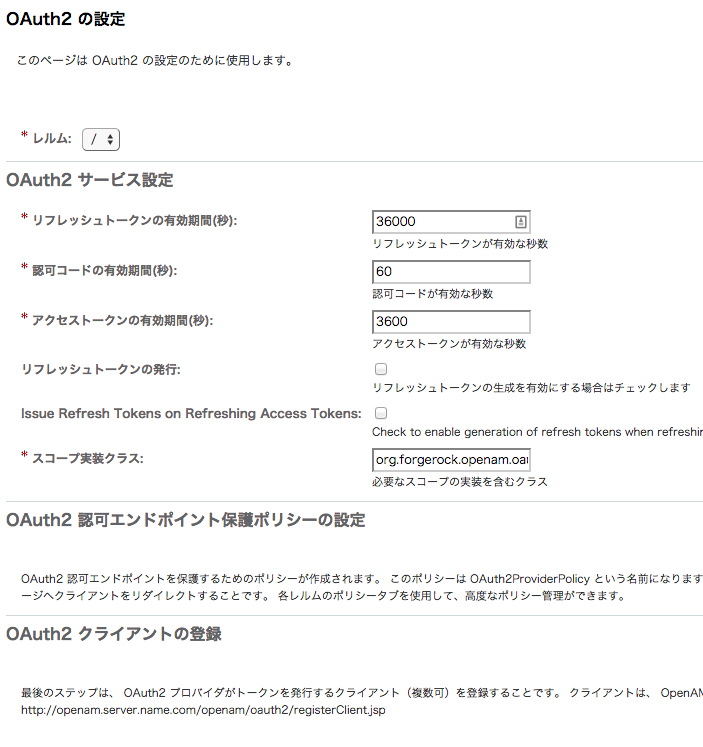
OAuth2の設定をクリック

- リフレッシュトークン
- 認可コード
- アクセストークン
を設定します。GoogleのOAuthを使ったことがある人は分かるかもしれませんが、それぞれ
| OpenAM | Googleの場合の値 | |
|---|---|---|
| リフレッシュトークン | refresh_token | 無期限 |
| 認可コード | code | 10(min) |
| アクセストークン | access_token | 3600(sec) |
となっています。今回は画像の値で登録します。これで保存するとOAuthプロバイダが作成されます。
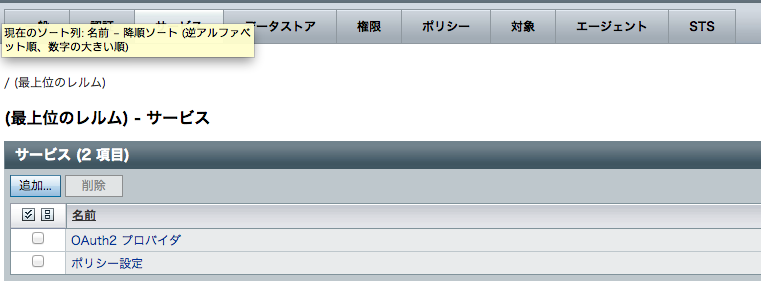
上部メニューでアクセス制御→/ (最上位のレルム)→サービスをクリックすると以下のように追加されていることが分かります。

OAuthプロバイダの設定は実は以上で完了です。以降は使用する上で必要な用語の説明をします。
エンドポイントについて
http://openam.example.com:8080/openam/.well-known/openid-configurationにアクセスすると、認証で使われる各エンドポイントが表示されます。
{
    "response_types_supported": [
        "token id_token",
        "code token",
        "code token id_token",
        "token",
        "code id_token",
        "code",
        "id_token"
    ],
    "registration_endpoint": "http://openam.example.com:8080/openam/oauth2/connect/register",
    "token_endpoint": "http://openam.example.com:8080/openam/oauth2/access_token",
    "end_session_endpoint": "http://openam.example.com:8080/openam/oauth2/connect/endSession",
    "version": "3.0",
    "userinfo_endpoint": "http://openam.example.com:8080/openam/oauth2/userinfo",
    "subject_types_supported": [
        "public"
    ],
    "issuer": "http://openam.example.com:8080/openam",
    "jwks_uri": "http://openam.example.com:8080/openam/oauth2/connect/jwk_uri?realm=/",
    "id_token_signing_alg_values_supported": [
        "HS256",
        "HS512",
        "RS256",
        "HS384"
    ],
    "check_session_iframe": "http://openam.example.com:8080/openam/oauth2/connect/checkSession",
    "claims_supported": [
        "phone",
        "address",
        "email",
        "openid",
        "profile"
    ],
    "authorization_endpoint": "http://openam.example.com:8080/openam/oauth2/authorize"
}
以下簡単な説明です。
| 名称 | エンドポイント | 説明 |
|---|---|---|
| registration_endpoint | /oauth2/connect/register | OPの動的クライアント登録用 |
| token_endpoint | /oauth2/access_token | アクセストークン取得用 |
| end_session_endpoint | /oauth2/connect/endSession | ログアウト用 |
| userinfo_endpoint | /oauth2/userinfo | 認証されたユーザークレームの取得用 |
| jwks_uri | /oauth2/connect/jwk_uri | 署名の検証用公開鍵 |
| check_session_iframe | /oauth2/connect/checkSession | ログインセッションのチェック用。RPからOPに確認取るために使用 |
| authorization_endpoint | /oauth2/authorize | 認可用。ここに投げると承認の確認画面に飛ぶ |
OpenID Connectで主に使うのはauthorization_endpoint、token_endpoint、userinfo_endpointかと思います。
次回はRP(Relying Parties)の登録です。