背景
Kubernetesは宣言的で自己回復するシステムを提供しているため、おかしなコミットが入ったdocker imageをapplyしてCrashLoopBackOffが発生していたりしても前のPodが生きていて気づかなかったみたいなケースがあります。
またメモリが瞬間的に枯渇するなどでメトリクスには表示されないレベルで急にOOMKilledされるケースがありますが、後からdescribeしてイベントをチェックして気づくことが多いです。しかしイベントは1時間しか保持されないので、調査が遅れると何が起きたかも調べられなくなります。
そこでKubernetes Eventを保持し、ケースによってはSlack通知してすぐに対応できるようにしたくなったのが今回の背景です。
環境
- Kubernetes v1.21.1
- opsgenie/kubernetes-event-exporter v0.10
ツール
今回はKubeCon 2019にて発表された opsgenie/kubernetes-event-exporter を使います。 Atlassianのアラート&オンコール管理チームが作ったツールです。
- フィルタが直感的に使える
- 出力先(sink)が多い
- Elasticsearch, Webhook, Slack, Kinesis, MS Teams, PubSub, etc...
という点から採用します。
設定方法
https://github.com/opsgenie/kubernetes-event-exporter/tree/master/deploy にサンプルのマニフェストがあるので、主にこれを使います。
中には3つのマニフェストがあります。
| マニフェスト | 説明 |
|---|---|
| 00-roles.yaml | RBACのロール設定。権限が足りない時はここを修正 |
| 01-config.yaml | configMapの設定。フィルタ、通知連携など基本的にここを色々設定していく |
| 02-deployment.yaml | deploymentの設定。中で↑のconfigMapを読み込むようになっている |
RBAC
権限周りの設定です。
apiVersion: v1
kind: Namespace
metadata:
  name: monitoring
---
apiVersion: v1
kind: ServiceAccount
metadata:
  namespace: monitoring
  name: event-exporter
---
apiVersion: rbac.authorization.k8s.io/v1
kind: ClusterRoleBinding
metadata:
  name: event-exporter
roleRef:
  apiGroup: rbac.authorization.k8s.io
  kind: ClusterRole
  name: view
subjects:
  - kind: ServiceAccount
    namespace: monitoring
    name: event-exporter
上記の通りnamespace: monitoringを別途切って管理します。
namespaceをまたいだ権限を付与するため、ClusterRoleをバインドしています。
ただ僕のGKE環境では上記では足りず、以下のエラーが出ました。
{
  "error": "nodes "xxx" is forbidden: User "system:serviceaccount:monitoring:event-exporter" cannot get resource "nodes" in API group "" at the cluster scope",
  "message": "Cannot list annotations of the object"
}
なので追加で以下の権限も付与しました。
kind: ClusterRole
apiVersion: rbac.authorization.k8s.io/v1
metadata:
  name: event-exporter-additional-roles
rules:
- apiGroups: [""]
  resources: ["nodes"]
  verbs: ["get", "list", "watch"]
---
apiVersion: rbac.authorization.k8s.io/v1
kind: ClusterRoleBinding
metadata:
  name: event-exporter-additional-roles
roleRef:
  apiGroup: rbac.authorization.k8s.io
  kind: ClusterRole
  name: event-exporter-additional-roles
subjects:
  - kind: ServiceAccount
    namespace: monitoring
    name: event-exporter
ConfigMapのフィルタ設定
ここでフィルタ、出力先の設定を行います。
デフォルトだと標準出力に全イベントを吐き出します。
apiVersion: v1
kind: ConfigMap
metadata:
  name: event-exporter-cfg
  namespace: monitoring
data:
  config.yaml: |
    logLevel: error
    logFormat: json
    route:
      routes:
        - match:
            - receiver: "dump"
    receivers:
      - name: "dump"
        stdout: {}
特定のイベントを除外したいケース
例えば以下の例は
*test*にマッチするnamespaceのイベントは除外type: Normalなイベント(=Infoログレベルのイベント)は除外
となります。
route:
  routes:
    - match:
        - receiver: "dump"
      drop:
        - namespace: "*test*"
        - type: "Normal"
配列で表現すればOR条件になり、
      drop:
        - namespace: "*test*"
        - type: "Normal"
ハッシュで表現すればAND条件になります。
      drop:
        - namespace: "*test*"
          type: "Normal"
このイベントだけ出力したいケース
以下の例は
- Pod、Deployment、ReplicaSetどれかのイベント
- 且つラベルが
version: devのもの
のイベントのみ吐き出します。
route:
  routes:
    - match:
        - kind: "Pod|Deployment|ReplicaSet"
          labels:
            version: "dev"
          receiver: "dump"
ConfigMapの出力先設定
receiversに出力先を定義し、routesのreceiverフィールドで指定します。
標準出力
route:
  routes:
    - match:
        - receiver: "stdout"
receivers:
  - name: "stdout"
    stdout: {}
GKEであればStackdriver loggingに吐き出されます。
slack
receivers:
  - name: "slack"
    slack:
      token: YOUR-API-TOKEN
      channel: "XXXXXXXX"
      message: "{{ .Reason }}"
      fields:
        message: "{{ .Message }}"
        namespace: "{{ .InvolvedObject.Namespace }}"
        object: "{{ .InvolvedObject.Name }}"
tokenには以下を参考にBot tokenを使いましょう。
テンプレートの変数は以下のstructを参考にします。
https://github.com/opsgenie/kubernetes-event-exporter/blob/master/pkg/kube/event.go
実際に導入
ConfigMap
デフォルトだと無駄なイベントが多いので、僕の場合は以下のように設定しています。
- 標準出力には全てのイベントを
- Cloud Logging(Stackdriver Logging)で後から検索できるよう
- Slackは対応が必要なイベントのみ通知
- フィルタ部分はreasonベースで除外
apiVersion: v1
kind: ConfigMap
metadata:
  name: event-exporter-cfg
  namespace: monitoring
data:
  config.yaml: |
    logLevel: error
    logFormat: json
    route:
      routes:
        - match:
            - receiver: "dump"
        - match:
            - receiver: "slack"
          drop:
            - type: "Normal"
            - reason: "NodeSysctlChange|KubeletStart|ContainerdStart|DockerStart|IngressGCE_RemoveNodes|Sync"
    receivers:
      - name: "dump"
        stdout: {}
      - name: "slack"
        slack:
          token: "xoxb-xxxx"
          channel: "XXXXXXX"
          message: "{{ .Reason }}"
          fields:
            message: "{{ .Message }}"
            namespace: "{{ .InvolvedObject.Namespace }}"
            object: "{{ .InvolvedObject.Name }}"
Apply
設定できたらそれぞれapplyします。
$ kubectl apply -f 00-roles.yaml
$ kubectl apply -f 01-config.yaml
$ kubectl apply -f 02-deployment.yaml
動作確認
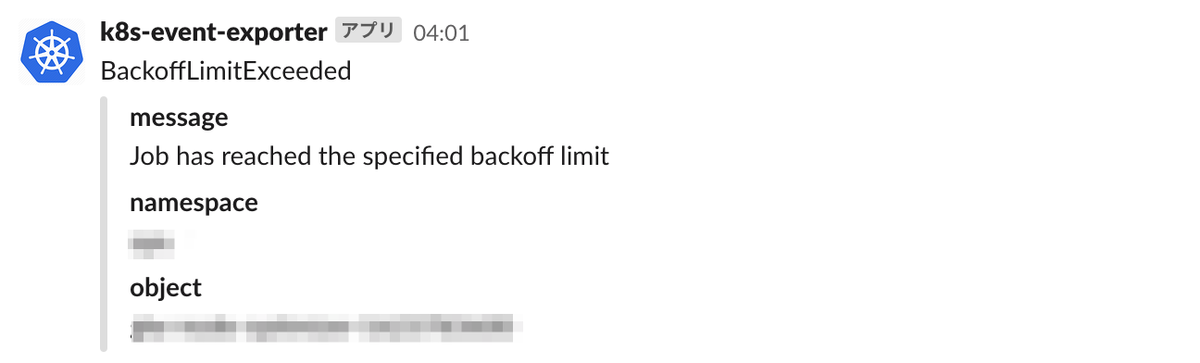
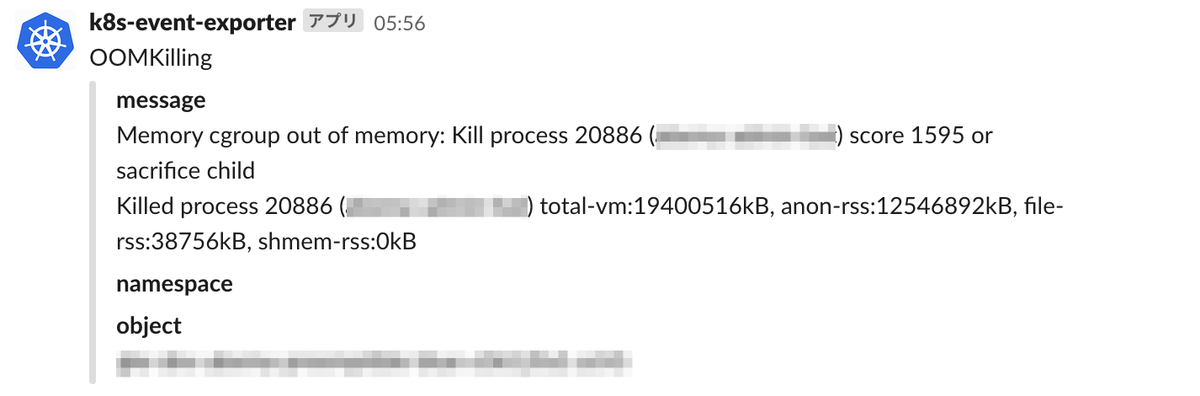
設定すると以下のように通知が来ます。
※slackアプリは名称・アイコンなど自前で用意しています
OOMKillingはNodeのイベントなのでnamespaceやPodの情報がないですが、Goのプロセスであれば実行ファイル名が出るのである程度特定可能です。
まとめ
Kubernetes Eventを保持して通知できる仕組みを説明しました。